
Ubuntu’s cloud releases (AMIs for AWS), which are listed at http://uec-images.ubuntu.com/releases/
[1], include an ubuntu package called
cloud-init.
Cloud-init, https://help.ubuntu.com/community/CloudInit [2], is a tool that will run a script during
the initializing of an ec2 image in the amazon cloud. It allows for custom deployment of an AMI as
it is initialized.
I think the best way to learn a tool is to start using it.
Simple script
test
Create a cloud-config script. This is the script that can be fed into the
instance as it initializes itself. This
script is run once when the EC2 instance is created not if/when it may reboot.
Ubuntu has many examples at http://bazaar.launchpad.net/~cloud-init-dev/cloud-init/trunk/files/head:/doc/examples/
[3]
I am going to use a simple example here that runs command
lines as the root user after the instance is created and boots up.
Here is the cloud-config file
#cloud-config
runcmd:
- [ wget, "http://www.google.com",
-O, /tmp/index.html ]
- [ touch, /tmp/bob.txt ]
|
This just runs a few command line commands, wget and touch.
To use this script when creating an instance via the EC2
console you need to do the following.

From the EC2 web console click on Launch Instance

Select Class Wizard and click Continue

Select the Ubuntu 64 bit AMI

Click Continue

Paste the cloud-config text in the User Data: area and click continue.

Click Continue

I gave mine a name “Test_10” so I can see it easily and
click continue.
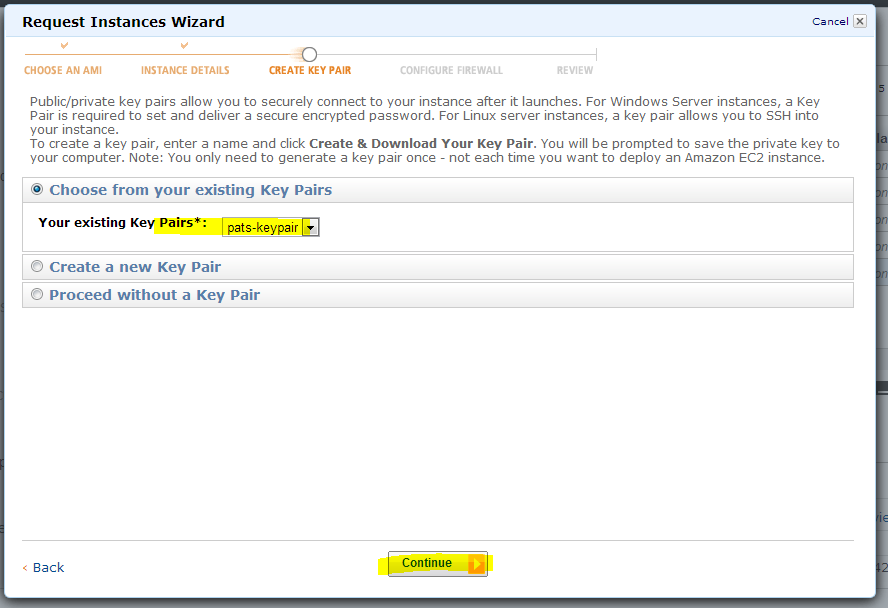
Choose your key-pair and click continue

Choose, or set up your security group and click
Continue. Rememner your security group needs to have port 22 open if you
expect to SSH to it.

Click Launch
Give it a minute or two to launch then ssh into your
instance. In my case my DNS address
was
ec2-174-129-94-111.compute-1.amazonaws.com
> ssh -i .ec2/pats-keypair.pem ubuntu@ ec2-174-129-94-111.compute-1.amazonaws.com
|
Now run
> ls -alh /tmp/
|

You should see the two files that the cloud-config script
created.
Debugging
It took me several tries to get this simple cloud-config
file working properly during which I found out were the log files for it are
and a few other handy tools for debugging.
First the log file.
The log file for this is located at
/var/log/cloud-init.log
The cloud-config.txt file is also saved off at this
location.
/var/lib/cloud/instance/cloud-config.txt
Another handy tool I used to help me debug a few things was
the ec2 command line ec2-get-console-output
Assuming you have the ec2 command line commands installed on
your system all you need is an instance id to run this.
> ec2-get-console-output i-47981a36
|
My instance was i-47981a36
This gave me the console output and gave me some information
and feedback on what the cloud-config output was. Not perfect, but there was some useful
information there.
Command line
As an alternative to using the ec2 web console to start an
instance you cabn use the command line tools.
Here is an example of using the command line tools with a cloud-config
file.
First make the cloud-config file.
> vi cloud-config.txt
|
And place the same cloud-config data from the ec2 console
example

> ec2-run-instances ami-fd20ad94 -b
/dev/sda1=:8:true -k pats-keypair -t t1.micro
-g default --availability-zone us-east-1a -f cloud-config.txt
|
Why not just use bash?
You could have done this simple command by passing it a bash
file.
For example you could have created this bash file.
#!/bin/bash
wget
http://www.google.com -O /tmp/index.html
touch /tmp/bob.txt
|
And pass it in when you create the instance and the results
are the same as the cloud-config file.
To be honest I have not spent enough time using the
cloud-config format to give all the whys.
I think you could get the job done with either bash or cloud-config but
I think cloud-config has some better tools to do some typical thins you need
done when creating a new instance. I
will use the rest of this document to show some examples I came up with for my
own needs.
Adding Users
One thing I personally need, for my systems, is to add users
to my own AMI images upon creation. The idea
being that I can set up an AMI, ready to go with all the installs I want but no
users (beyond the default ubuntu user).
Then I can kick off a machine from that AMI and add users to it upon
creation with their ssh keys. This is
important if you work for a company with people coming and going. If a user leaves I can simply remove them
from the cloud-config script. (I would also have to update any running
machine, or replace them)
For a prior small client I put the ssh keys in the AMI which
was convenient, assuming no one joins or leaves the company. The minute someone did I would have to update
all the AMIs with new users/ssh keys.
Having said all that lets get into what I did to make this
work. First off it appears that Ubuntu
12.04 does not support the “users” cloud-config feature, so I had to user 12.10
(it took me a while to figure that one out.
Example location
An Ubuntu server has example files for cloud init in the
following folder
/usr/share/doc/cloud-init/examples
Make sure to go here for ideas
Adding a user with a password
First you need a md5 crypted password. The easiest way to do this is to download the
whois package.
> sudo apt-get install whois
|
Now run this to create an crypted password
> mkpasswd -m sha-512
|

Here I enter the password “password” and got the value
$6$VaL1/XcbO$QWjXoxu9Q8v5tDZAiFmvzgLGVsGj3SpYbP8//FCZaacDaJX1HqmzvpNMEPd7ag65e5zmu.kLDxpD8GcwtK4bx1
You need this value, well using your own password, to create
a user with cloud-init and automatically set their password.
Alternatively you could rip out your current password from
your /etc/shadow file
Run this command, but enter your username
> sudo tail /etc/shadow | grep patman
|

And copy the hashed password between the first and
second colon “:”
Here is a cloud-config file I attempted to use that did not
work. I am showing it here for a purpose
so bear with me.
#cloud-config
# Add groups to the
system
# The following
example adds the ubuntu group with members foo and bar and
# the group
cloud-users.
groups:
- patman
# Add users to the
system. Users are added after groups are added.
users:
- default
- name: patman
gecos: Patrick Bailey
primary-group: patman
groups: admin
passwd: $6$72xKa0rf$jTBvOqibuTMp7d3Tlvo6MP7MSv1V8IJpVUXvjlJos0KECsOnG5dFYTDAP9MadGhgaCCKNT0RFGKXj9fLlTwhW1
|
This first creates the group patman. Then it creates the user patman and assigns
his primary group to patman and adds him to the admin group. Then gives him the passwd
I then used this command line command to instantiate a
machine.
> ec2-run-instances ami-7539b41c -b /dev/sda1=:8:true -k pats-keypair -t
t1.micro -g default
--availability-zone us-east-1a -f cloud-config.txt
|
Notice the AMI is for a 12.10 Ubuntu AMI rather than a 12.04
one.
Logging into this instance
(make sure to use your dns location)
> ssh -i .work_ec2/pats-keypair.pem ubuntu@ec2-107-22-7-176.compute-1.amazonaws.com
|
Looking at the /etc/passwd file
> sudo vi /etc/passwd
|

I can see that the patman user was made.
If I look in the /etc/group file
> sudo vi /etc/group
|

I can see the patman group was made and that the patman user
was added to the admin group.
But I cannot switch to the patman user using the password I
gave it in the cloud-config file….
Looking in /etc/shadow you can see the issue
> sudo vi /etc/shadow
|

The password is there, but there is an exclamation point in
front of it.
I found out from here http://linuxg.net/some-etcshadow-magic/
[4] and here http://www.ducea.com/2007/12/05/howto-disable-a-user-account-in-linux/
[5] That an exclamation indicates it does not have a password. If I remove the exclamation by hand and try
again it works.
It took me a long time to figure out this issue. However that was not the only issue that had
to be solved…
The following does not work either, but should
#cloud-config
# Add groups to the
system
# The following
example adds the ubuntu group with members foo and bar and
# the group
cloud-users.
groups:
- patman
# Add users to the
system. Users are added after groups are added.
users:
- default
- name: patman
gecos: Patrick Bailey
primary-group: patman
groups: admin
lock-passwd: false
passwd: $6$72xKa0rf$jTBvOqibuTMp7d3Tlvo6MP7MSv1V8IJpVUXvjlJos0KECsOnG5dFYTDAP9MadGhgaCCKNT0RFGKXj9fLlTwhW1
|
I had to dig into the actual cloud init code to figure out
why this was not working.
> cd /usr/share/pyshared/cloudinit/
> sudo grep -rn lock_passwd *
|
Which got me to /usr/share/pyshared/cloudinit/distros/__init__.py
line 267
> vi +267 /usr/share/pyshared/cloudinit/distros/__init__.py
|

The issue is this system line. You need to add the “system” and set it to
false to get it to work properly. System,
if set to true assumes it’s a system user and does not create a home directory.
Here is a cloud-config file that did work.
#cloud-config
# Add groups to the
system
# The following
example adds the ubuntu group with members foo and bar and
# the group
cloud-users.
groups:
- patman
# Add users to the
system. Users are added after groups are added.
users:
- default
- name: patman
gecos: Patrick Bailey
primary-group: patman
groups: admin
passwd: $6$72xKa0rf$jTBvOqibuTMp7d3Tlvo6MP7MSv1V8IJpVUXvjlJos0KECsOnG5dFYTDAP9MadGhgaCCKNT0RFGKXj9fLlTwhW1
runcmd:
- [passwd, patman, '-u']
|
Because of the issue you need to add a runcmd which in this
case runs the command “passwd patman –u”
which will unlock the user patman’s password.
My Final user add code with ssh keys
#cloud-config
# Add groups to the
system
# The following
example adds the ubuntu group with members foo and bar and
# the group
cloud-users.
groups:
- patman
# Add users to the
system. Users are added after groups are added.
users:
- default
- name: patman
shell: /bin/bash
gecos: Patrick Bailey
primary-group: patman
groups: admin
passwd: $6$72xKa0rf$jTBvOqibuTMp7d3Tlvo6MP7MSv1V8IJpVUXvjlJos0KECsOnG5dFYTDAP9MadGhgaCCKNT0RFGKXj9fLlT
ssh-import-id: None
ssh-authorized-keys:
- ssh-rsa AAAAB3NXXXXX
- ssh-rsa AAAAB3XXXXXXX
runcmd:
- [passwd, patman, '-u']
|
Here I added the shell command to designate my shell
preference.
I set the ssh-import-id to None, this is a feature that
imports ssh public keys from a site (not something I am familiar with).
Then I added the ssh-authorized-keys and added the actual
public keys from my system.
Now I can happily run this to ssh to the machine after it
has been initiated
> ssh
patman@ec2-23-20-92-205.compute-1.amazonaws.com
|
Installing Apache
This example came from a video I found at http://www.youtube.com/watch?v=-zL3BdbKyGY
[6]
You can use cloud-config to install packages. In this example I update the apt tools and
install apache2.
#cloud-config
apt_update: true
apt_upgrade: true
packages:
- apache2
|
By using this script and if you have port 80 open for this
server you
You should be able to open up its location and see that
apache is running.

References
[1] Ubuntu Cloud
Images
Visited 1/2013
[2] Ubuntu CloudInit
Visited 1/2013
[3] cloud-init-dev/cloud-init/trunk
Visited 1/2013
[4] Some /etc/shadow
Magic
Visited 1/2013
[5] HowTo Disable a
User Account in Linux
Visited 1/2013
[6] Ubuntu Cloud-Init
Technology
Visited 1/2013
No comments:
Post a Comment