Release updates and a warning
ESXi 5.5 was released on 9/22/2013 as noted at https://www.vmware.com/support/vsphere5/doc/vsphere-esx-vcenter-server-55-release-notes.html
[1] . Two big changes in this release,
versus vs 5.1, is the removal of the ram limitation http://www.vladan.fr/esxi-5-5-free-version-details/
[2]. This is good news for those of who
use the free version and need more ram!
On a side note it does require a minimum of 4 GiB of memory
One word of warning before you replace version 5.1. According to a discussion at this forum https://communities.vmware.com/thread/457843?start=15&tstart=0
[3] 5.5 adds a web interface, it still supports
vSphere client, but for the free version if the VM is a version 10 VM you can't
edit its settings after its creation.
You can edit a version 10 VM using Workstation 10 connected to your ESX
box (that is my plan), or you can keep all your VMs as version 9 VMs.
Installing ESXi 5.5
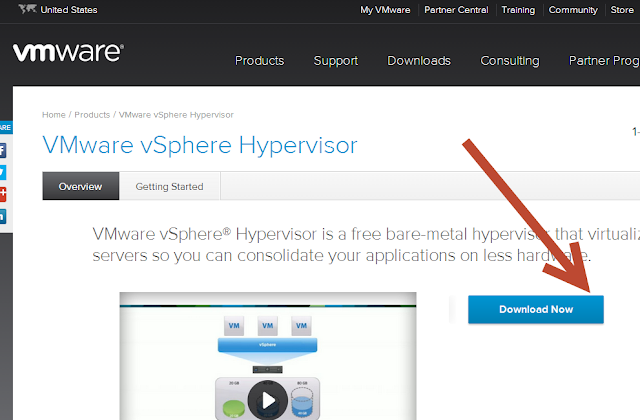
First you need to download ESXi
5.5 from the VMware web site. Go to http://www.vmware.com/products/vsphere-hypervisor
[4] . Then from here click on Download
Now
http://www.vmware.com/products/vsphere-hypervisor/overview.html
[1]. Then from here click on
download.
Login with you vmware account or create a new account.
And then log in.
After you login it should forward you to the
“License and Download” page
Now right down this license number (this is for the free version of the esxi
server and vSphere client).
Click on “Manual Download” and download
the ESX 5.5 installable (CD ISO)
Now burn the iso to a CD.
On Win-7 You can right click on the ISO and select “Burn
disc image”
Then click burn
Now put the install disc in the machine you want to install
ESXi 5.5 on. Reboot the machine and
watch the ESXi installer start.
Select ESXi-5.5.0-…. Standard installer and click enter.
The ESXi 5.5 installer will start.
Another installer screen
After it is done you will see this screen
Click Enter to continue
Click on F11 to accept license
Scanning…
Select which drive to install on and click enter.
Select US Default keyboard and click enter
Enter a password, confirm it and click enter
If your hardware does not support on-chip virtualization you
may get this screen. You have a few
options here, if your CPU does have VT technology you need to reboot, get into
the BIOS settings and turn on the VT-technology. Or if it does not you could get a new chip
that does have VT-technology and install it or Just click Enter to continue,
this usually limits you to 32-bit virtual machines. Plus they will run a little bit faster if you
have vt magic on your chip
Now wait for the install.
Success, click Enter to reboot
After a reboot you will see this.
Click on F2 to customize
Enter your password and click OK
Select Configure Management Network and click enter
Here you can set up your specific network information
Such as setting up a static IP. I will not go into what you should do here
as each person has their own needs, as for my simple system I just set the
static IP.
Checkbox the "Set Static IP address" by pressing
the space bar. Set the IP address to
what you want it to be. In my case I set
it to 192.168.0.95 Then press enter.
Once you are done with this you need to click esc
Which brings up this screen
Press Y
Press Esc to get back to the main screen
From here you can see the IP address has been updated.
To make sure its all working correctly reboot. To do this click F12
Enter your username/password and click OK
Click F11
Wait for the restart to take place.
After a reboot it all looks good.
VSphere Client Installation
The server displays a web page to download the VShpere
client from
Open up a web browser on a system it will immediately
forward you to https version of the site.
Click “Proceed Anyway”
You will see this page click on Download vSphere Client.
You will see some notes about The vSphere web client (which
as far as I can tell cannot be used in the free version of ESXi 5.5… you need a
paid for vCenter to use it)
Now install the VSphere Client you just downloaded
Click Next
Accept the License
Click Next
Click Next
Click Install
It will now start installing, this may take a few minutes.
Click on Finish
Log into VSphere Client and set the License
Open up VSphere Client and put the ip address of your server
and set username to root and password to the password you set before and click login
Notice the warning,
they are moving to the Web Client in the future to replace the vSphere
client.
A security certificate should pop up click ignore.
Let’s take care of that notice by registering you ESXi box
Click on Configuration then click on Licensed Features.
Now click edit
Click on Assign a new license then click Enter Key
Enter you key and click OK
Then click OK again
Now you should see this screen, you are registered!
As a quick comparison you can see in version 5.1 of the ESXi
server it only allows up to 32GiB of memory.
ESXi 5.5 has no such limitations!
A closer look
References
[1] VMware vSphere® 5.5 Release Notes
Accessed
10/2013
[2] ESXi 5.5 Free Version has no more hard limit 32GB of RAM
Accessed
10/2013
[3] ESXi 5.5 Free Hypervisor Web Console
Accessed
10/2013
[4] VMWare vSphere Hypervisor
Accessed
10/2013


