

I
really like the idea of the Intel Edison.
I think it can be a very important piece in the Internet of Things
(IoT).
I
am more of an Ubuntu guy, but there is no Ubuntu Distribution for the Edison …
Yet... But, thanks to the guys at Emutex
lab http://www.emutexlabs.com/ [2] there is now a Debian based Linux for
the Edison called Ubilinux.
This
guide shows how to install Ubilinux onto your Intel Edison on a Windows 7
machine using Cygwin.
Edison Set up
I
purchased an Intel Edison with an Arduino Breakout kit from Sparkfun (https://www.sparkfun.com/products/13097 )
This
is what I am going to use to run my Edison.

Cygwin
What is Cygwin?
It's a Unix like command -line interface for windows. It's maintained by the good people at
RedHat. It's not pure Linux but it's as
good as we get on the Windows platform currently.
Installing Cygwin
How do you install and set up Cygwin for the first time?
Head over to https://www.cygwin.com/
[3] to download Cygwin.

Click Install Cygwin

Click on setup-x86_64.exe
(Unless you have the rare case where you have 32-bit windows, in that
case click on the setup-86_32.exe)
Run the program

Click Next

Select Install from Internet
Click Next

I leave the Root Directory as default.
Click Next.

Click Next.

Click Next

Select a Mirror site (does not really matter which
one). And Click next

It starts to download.

Now here is the fun part.
Cygwin does not have a simple nice package manger where you can install
packages on the fly. You have to use
this tool to install them before you start running Cygwin. There are several tools you need to select
to install here.
Let's start with the first one.
wget

Search for wget, click Web.

Click Skip

Now wget will be installed.
Other Libraries
Here is a list of other tools to install in Cygwin
- autoconf
- automake
- bash-completion
- bzip2
- crypt
- curl
- diffutils
- gcc-core
- gcc-fortran
- gcc-g++
- git
- git-completion
- less
- libusb1.0 / libusb1.0-devel
- lynx
- make
- nano
- ncurses
- openssh
- perl
- pkg-config
- python
- rsync
- run
- screen
- tree
- unzip
- vim
- zip
This list of tools is more than the minimum list you need to
install Ubilinux. It includes several tools you will probably find you need in
the future as you play around with the Intel Edison.
For each tool I list here to install I am going to put up a
screen-shot to make life easier for you.
Autoconf

Automake

Bash-completion

bzip2

Crypt

Curl

Diffutils

Gcc-core

Gcc-fortran

gcc-g++

Git /
git-completion

Less

Libusb 1.0

Lynx

Make

Nano

Ncurses (gets you clear)

Openssh

perl

Pkg-config

Python

Rsync

Run

Screen

Tree

Unzip

Vim

Zip


… OK now that is done click Next

Click Next

Watch it download and install all
the tools you selected.
(this will take some time)

When it’s finally done click Finish

Now you should have a Cygwin
Shortcut on your Desktop.
Double Click it to open it.

And it's running.
If the font is too small to read
(for me it is). Here is how to adjust
it.

Right click on the window bar and
click Options.

Select Text and click Select

Select a bigger font and click OK.

Click OK

Now you can read it.
Pin it to the taskbar (if you want)

Right click on the Cygwin
application in the Taskbar and select Pin this program to taskbar.
Now it will remain there when you stop the program.
Edit the prompt
You do not
need to do this! I just want to point it
out so you know why my prompt looks different.
Here is my custom prompt code.
PS1="\[\033[1;30m\]\[\033[42m\][\u@\H]\[\033[30m\]\[\033[0m\]\w \n \[\033[1;32m\]❯\[\033[1;33m\]❯\[\033[1;31m\]❯
\[\033[1;37m\]"
|
Pretty confusing right? Well this bit of code needs to be added to a
hidden file named .bashrc Open
this file for editing
> vim ~/.bashrc
|
And add that bit of code to the
bottom

Save it… Then quick cygwin and
start it up again.

Now I have my prompt…. Again you do
not need to do this. I just wanted to
show it so you know why my prompt
Getting it working
This is not
for the easily intimidated. There are
going to be a lot of downloading, uploading, tweaking, plugging in and out… But
in the end I think it will be worth it J
Drivers and Software
Head over to
(This page could move or be re-directed, the main idea is to
find the UBS drivers for Edison)

Download "Window 64 Integrated Installer"

After it downloads click on the installer.

Double click on the installer and click Run

If this pops up, click Yes.

It starts up.

Click Next.

If you don't have Java installed you will get this
message. You do not need this
installed for Edison. It is only needed
if you are going to install Eclipse for writing code.
Click Next

Oh neat! They updated
the installer to be a bit more helpful. At this point you need to plug in the Edison
to your system via USB.
Plug it in

Make sure the switch is pointing towards the two usb
ports. Plug into the inner USB port.

Give it a few moments. Once it detects it, the Next will become clickable.
Click Next.
If it never becomes available… see the debugging
section at the end

Accept the license and click Next.

For my purposes I only need the Drivers. So I am going to de-select Update Image and Development tools.

Click Next.

Click Next.

Click Next

Watch it install

Pop up, Click Install

Another pop up, click Install.

A third pop up, click Install.

A fourth pop up, click Install

Fifth pop up, click Install.

Click Finish.

At this point you should be able to see the Edison mounted as an empty Hard Drive.
Install Ubilinux
Open up http://www.emutexlabs.com/ubilinux
[7]


Right click on "Ubilinux for Intel Edison" And
select Copy Link Address.
In my case I copied
Note: 150309
translates into 03/09/2015. This is the
latest version as of 8/18/2015 a few details about this release can be found at
http://www.emutexlabs.com/blog/225-new-ubilinux-for-intel-edison-released
[8] Looks like they added git and mraa J
From cygwin…
Open up a cgywin terminal

I am going to create a folder called ubilinux go into that
directory and download the Ubilinux file from the link I copied earlier using
the wget command.
> cd
> mkdir ubilinux
> cd Ubilinux
> wget http://www.emutexlabs.com/files/ubilinux/ubilinux-edison-150309.tar.gz
|
The download may take 15-30+ minutes.

I threw a time in front of wget to time the download.

Took me 15+ min to download.
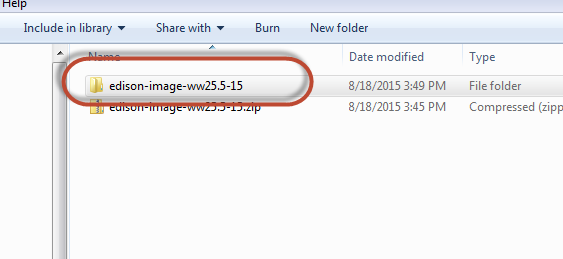
Extract the contents of the file by running the following
command.
> tar -xvf ubilinux-edison-150309.tar.gz
|

This will extract all the files in a folder called toFlash.
cd into the toFlash
directory and run the flashall.sh script
> cd toFlash
> ./flashall.sh
|

You should get this error dfu-util: command not found.
Press ctrl+c to stop it.
OK, how do I fix this?
And what is dfu-util? http://dfu-util.sourceforge.net/
[9].
DFU is intended to download and upload
firmware to/from devices connected over USB. It ranges from small devices like
micro-controller boards to mobile phones.
OK it's a tool to upload the firmware via USB, in our case
to the Intel Edison.
Installing dfu-util
Run the following commands to install the dfu-util tool
> cd
> git clone
git://git.code.sf.net/p/dfu-util/dfu-util
> cd dfu-util
> ./autogen.sh
> ./configure
> make
> make install
|
Then to test run
> dfu-util -l
|

Wahoo it's working!
Unplug the Intel
Edison
Unplug the Edison.
Go back into the toFlash directory and run ./flashall.sh
> cd
> cd ubilinux/toFlash
> ./flashall.sh
|

When you get this message, plug the USB cord back into the
intel Edison.
(If you happen to get an error stop the flashall.sh ctrl+c
and run it again)

Let it install Ubilinux.
Once it's done leave it plugged in and alone for at least 2
minutes…
If you happen to get an error…
Press ctrl+c to cancel and then rerun it again
Connect to it using picocom
There are two ways to connect to the Intel Edison with
Ubilinux (when it is first installed… I will fix it to a simpler way later on).
1. You can use Ethernet over USB and ssh to IP address
192.168.2.15.
I found this to be a
real pain to get working with the Win-7 + Cygwin combo.
2. The other method is to connect to it via serial
console. To do that you need to
download some software on Cygwin. (As a
side note, the linux 'screen' command should be able to do it, but I could not
get it to work correctly in cygwin.
Instead I am using picocom)
Download and set up picocom
Picocom can be found at https://code.google.com/p/picocom/downloads/list
[8]
Switch to your home directory and download piccom
directly. Untar the download.
> cd
> wget https://picocom.googlecode.com/files/picocom-1.7.tar.gz
> tar -xvf
picocom-1.7.tar.gz
|

Cd into the picocom folder and run make
> cd picocom-1.7
> make
|
See if picocom.exe is there
> ls -alh
|
You should now have a file called picocom.exe

Create a folder to put picocom into. And cd into it.
> mkdir
/usr/local/picocom
> cd
/usr/local/picocom
|

Copy the picocom.exe file to this folder.
> cp
~/picocom-1.7/picocom.exe .
> ls
|

Create a symlink (shortcut) to this program. This will make it easier to use this command
in the future.
> ln -s
/usr/local/picocom/picocom.exe /usr/bin/picocom
|
To test if the symlink is working you can use the which
command.
> which
picocom
|

Perfect it gives back the location of the symlink.
You should now be able to run picocom from any
directory. Change back to your home
directory.
> cd
|
Use Picocom
OK, we are set up let's use the picocom to talk to the
board!
You need to plug in a usb cord to the console usb (the one
at the edge of the board). This USB does
not provide power to the intel Edison board so
you either need to use a DC plug in or plug in the other USB cord.
Here is my set up.

But you could also set it up like this

The power cord I am using is a 9VDC/650mA In fact here is the one I bought from
Sparkfun https://www.sparkfun.com/products/10273
After you plug in the console and the power make sure your
computer can see it.
Cygwin lists usb connection points in the /dev folder. Run
this command to find the connection point.
> ls -alh
/dev/tt*
|
If you don't see it you may need to give it a minute to
mount. Just run it again… You may even need to unplug the usb and plug
it in again.

There it is. In my
case its /dev/ttyS8, yours may have a different number.
Finally! Login to the
edison via the console using picocom with the following command. (Change ttyS8 to what your usb connection
point)
> picocom -b
115200 /dev/ttyS8
|

Terminal starts up.
Press the return button!
If you don't you will be staring at a screen doing nothing for a long …
long time!

Hey look the login!
Login with the following credentials.
Username : root
Password: edison

I am in J
Before I get too far…. How do you get out of picocom? The typical ctrl+c will not work.
Run exit to get back to the login screen.
> exit
|

Then to get out press Ctrl+a+x (all at same time)

Connect to your Wifi Network
You don't really want to be using picocom to login to
Ubilinux. What you want to do is to be
able to easily ssh to this machine. The
first step in doing that is getting it to attach to your home network using its
built in wifi.
Log back into the console
> picocom -b
115200 /dev/ttyS8
|
There is a file located at /etc/network/interfaces. This file defines how to set up your
network. The default settings have the
Wi-Fi turned off, you need to turn it back on.
I am going to use a tool called vim to edit the file from the
command line. If you are unfamiliar
with it you are in for a little learning curve.
But, learn it! It will be worth
it in the long run. For now I will show
you how to use a few commands in vim.
Run this command to open the file in the vim editor.
> vim /etc/network/interfaces
|
Press i
To go into Insert mode.

In insert mode you can insert and delete text, much like you
would be able to do in Microsoft Word.

Use your arrow keys to move around and add a '#' in front of
auto usb0 (this comments it out, effectively turning the Ethernet over USB off)

Next scroll down to this line and remove the # from in front
of it. (effectively turning on the WiFi
connection)

Update the name after wpa-ssid to the name of the Wi-Fi
network you want to connect to.
Update the wpa-psk to the password of the Wi-Fi network.
Save and close the file
To do this you need to first press
Ctrl+c
Then
:

At this point you should see a colon on the bottom left.

Enter in x and press enter
The file should be saved and closed in one step.
Restart the networking service
> service
networking stop
> service
networking start
|
Hopefully you are now connected and you now have an IP
address from your WiFi network.
To check what your IP address is run the following command.
> ifconfig -a
| grep wlan0 -A 1
|

In the wlan0 section look for inet addr. I have IP address 192.168.0.10. Take note of your IP address it's probably
something else.
Test it out!
From the console see if you can ping google.com
> ping
www.google.com
|

It's working press ctrl+c to stop
Open up another terminal in Cygwin. And ping your Edison, use your ip address.
> ping 192.168.0.10
|

Houston we have lift-off!
Login via SSH
Exit out of the serial console.
> exit
|
Then press ctr+a+x to exit
out of picocom

Now, hopefully you never have to use picocom again J
Unplug the USB cord
!!!!

Well… Assuming you have a DC plug in. Otherwise keep the inner USB connected.
But if you do have the inner USB connected for power
purposes it does not need to be connected to your computer you can connect it
to a simple usb outlet.
Point being… at this point your Edison does not need to be
tethered to a computer at all.
Login via ssh! (may
need to change the address to your own)
> ssh root@192.168.0.10
|

When prompted to continue enter (yes). Then when prompted for you password enter
'edison'
You are now logged in!
Exit it
> exit
|
(no more need for ctrl+a+x)
That's it! You are done!
Well seems a bit boring at this point not to have it do something like blink a light or something.
Blink a light via the command line
Let's blink a light
… the hard way by hand…
<SoapBox>
Why do I mean the hard way?
In the long run I want to write some programs… perhaps in JavaScript
using Node JS. Writing a program in a
mature higher level language will in the long run be easier, but it does take
some initial set up and some time to learn…
You can accomplish the same goals by… doing it the hard
way. By going into linux and writing to
files (turning on GPIOs) and writing simple bash scripts to flip them on and
off. I think it's good to know how to
do this and has value, but in the long run, although you may still use a bash
script now and then, your programs to control the Edison should be written in a
higher level language (Python/Javascript).
</SoapBox>
Oh one more soapbox moment
<SoapBox>
I have the Intel Edison Arduino Breakout Kit. This board maps Edison GPIOs to Arduino
Breakout IOs. It's using the super
powerful Edison to effectively pretend to be an Arduino… I think you can even
upload Arduino programs to it.
I think, in the long run, this is a bad idea. Had I known what I know now I would not have
bought this breakout board. Rather I
would have bought SparkFun Starter Pack https://www.sparkfun.com/products/13276

This kit abandons the idea of 'faking' and Arduino and
includes their Edison GPIO board, which does not map anything to anything but
rather routes some of the GPIO from the Edison to make them easier to attach to.
I think this is the way to go, no more Arduino
sketches! You basically have a small
linux server with so much more power.
Arduino still has its place just not being faked on the Edison (in my
opinion)
</SoapBox>
Breakout Chart
OK rants done… now we need to know the mapping from Edison
GPIO to the Arduino breakout.
I found several sites that list their own breakout chart.
https://communities.intel.com/servlet/JiveServlet/previewBody/23161-102-8-27954/edison-arduino_HG_331191-005.pdf
(page 8 [14])
Here is my simple
breakout chart
Arduino Breakout
|
Edison Pin (Linux)
|
Output Enable (high = output)
|
0
|
GP130
|
248
|
1
|
GP131
|
249
|
2
|
GP128
|
250
|
~3
|
GP12
|
251
|
4
|
GP129
|
252
|
~5
|
GP13
|
253
|
~6
|
GP182
|
254
|
7
|
GP48
|
255
|
8
|
GP49
|
256
|
~9
|
GP183
|
257
|
~10
|
GP41
|
258
|
~11
|
GP43
|
259
|
12
|
GP42
|
260
|
13
|
GP40
|
261
|
A0
|
GP44
|
232
|
A1
|
GP45
|
233
|
A2
|
GP46
|
234
|
A3
|
GP47
|
235
|
A4
|
GP14
|
236
|
A5
|
GP165
|
237
|
Blinking a light
I am going to follow this video from SparkFun https://www.youtube.com/watch?v=cKA2gx4JgSY [11]and blink an led light connected to
Arduino Pin 8.
Set up LED
To do this you need a breadboard, resistor, some Jumper
wires, and an LED.
Use them to create something like this.


Program the blink
Login via ssh! (may
need to change the address to your own)
> ssh root@192.168.0.10
|
Each GPIO you want use has to be enabled. To do that you need to write the number of
the GPIO to the file /sys/class/gpio/export.
I want to use Arduino pin 8.
If I look at my chart I see pin 8 = GP49. I need to write '49' to this file.
Here is a simple command to do that.
> echo 49
> /sys/class/gpio/export
|
Before going any further set pin 214 TRI_STATE_ALL to low
Run this command to do this set it us so you can set it to
low (does not actually set it to low )
> echo 214
> /sys/class/gpio/export
|
What does this do? I
have no idea at this point in my electronics education. I am guessing it puts other pins in a 'safe'
mode? If you know what it is tell me and
I will update this post.
Now to set it TRI_STATE_ALL to low run the following
command.
> echo low
> /sys/class/gpio/gpio214/direction
|
Then we need to run this command so we can control the
direction of GPIO49 (see chart above 256
controls direction of GPIO49)
> echo 256
> /sys/class/gpio/export
|
Now you need to set the direction of GPIO49 (pin 8) to an
output. To do that, run the following
command.
> echo high
> /sys/class/gpio/gpio256/direction
|
Now that we are done set TRI-STATE back to high
> echo high
> /sys/class/gpio/gpio214/direction
|
Now set gpio49 to out (seems a little redundant)
> echo out
> /sys/class/gpio/gpio49/direction
|
Now to turn the LED on (set to high) run this command.
> echo 1 >
/sys/class/gpio/gpio49/value
|
And it's on!

To turn it off echo 0 back into that same file
> echo 0 >
/sys/class/gpio/gpio49/value
|

Create a simple Bash script
Create a script with vim called blink.sh (this is from the Sparkfun video)
> vim blink.sh
|
Put this in the file
#!/bin/bash
#
# My Blinky Code
#
###############
echo 49 > /sys/class/gpio/export
echo 214 > /sys/class/gpio/export
echo low > /sys/class/gpio/gpio214/direction
echo 256 > /sys/class/gpio/export
echo high > /sys/class/gpio/gpio256/direction
echo high > /sys/class/gpio/gpio214/direction
echo out > /sys/class/gpio/gpio49/direction
while :
do
echo 1 >
/sys/class/gpio/gpio49/value
sleep 1
echo 0 >
/sys/class/gpio/gpio49/value
sleep 1
done
|
Make it executable
> chmod u+x
blink.sh
|
And run it.
> ./blink.sh
|

To stop it press ctrl+c

You do get this error which is a result of re-exporting
gpios that have already been exported.
To stop it press ctrl+c
How about we still run them each time but suppress the
warning so we don't see it…
> vim blink.sh
|
Update the code to this.
#!/bin/bash
#
# My Blinky Code
#
###############
echo 49 > /sys/class/gpio/export 2> /dev/null
echo 214 > /sys/class/gpio/export 2> /dev/null
echo low > /sys/class/gpio/gpio214/direction
echo 256 > /sys/class/gpio/export 2> /dev/null
echo high > /sys/class/gpio/gpio256/direction
echo high > /sys/class/gpio/gpio214/direction
echo out > /sys/class/gpio/gpio49/direction
while :
do
echo 1 >
/sys/class/gpio/gpio49/value
sleep 1
echo 0 >
/sys/class/gpio/gpio49/value
sleep 1
done
|
Now run it again…
> ./blink.sh
|

The messages are being routed to /dev/null (think of it as a
black hole things go in but never come out)
We need some syntax highliting
Open up the script in vim again
> vim blink.sh
|
Then press ctrl+ c then :
And enter in
'syntax on' and press enter


Now your code is more readable.
You can add this as a default by editing .vimrc file
> vim ~/.vimrc
|
Add
syntax on
|

And save it.
Now re-open blink.sh
> vim blink.sh
|
Now it's highlighted and will be the next time you open a
file in vi.
Improving the code a little…
#!/bin/bash
#
# My Blinky Code
#
###############
echo 49 > /sys/class/gpio/export 2> /dev/null
echo 214 > /sys/class/gpio/export 2> /dev/null
echo low > /sys/class/gpio/gpio214/direction
echo 256 > /sys/class/gpio/export 2> /dev/null
echo high > /sys/class/gpio/gpio256/direction
echo high > /sys/class/gpio/gpio214/direction
echo out > /sys/class/gpio/gpio49/direction
mode=0
while :
do
echo $mode >
/sys/class/gpio/gpio49/value
sleep 1
mode=$((($mode+1) % 2))
done
|
Use a little algebra mode = 0.. echo 0. Add 1 to mode… mode = 1.
Then mod 2 (basically divide by 2 and keep the
remainder. We get 1.
Come around again
mode = 1… add 1 to mode … mode = 2.
Mod by 2… 2/2 has a remainder of 0 so mode = 0.
Now run it again…
> ./blink.sh
|
You can speed up the blinking
#!/bin/bash
#
# My Blinky Code
#
###############
echo 49 > /sys/class/gpio/export 2> /dev/null
echo 214 > /sys/class/gpio/export 2> /dev/null
echo low > /sys/class/gpio/gpio214/direction
echo 256 > /sys/class/gpio/export 2> /dev/null
echo high > /sys/class/gpio/gpio256/direction
echo high > /sys/class/gpio/gpio214/direction
echo out > /sys/class/gpio/gpio49/direction
mode=0
while :
do
echo $mode >
/sys/class/gpio/gpio49/value
sleep 0.25
mode=$((($mode+1)
% 2))
done
|
What to do next?
I am going to buy the Sparkfun Intel Edison Base and GPIO
Blocks and rewrite this tutorial for those.
If there is enough interest in this subject I will probably
write up a similar tutorial showing how to do it on OS X.
After that I am thinking about doing some write ups on using
node and npm to start programming and controlling something.
Debugging
If you get to this screen

And it the next button never becomes available…
What do you do?
Well Chances are this means you have Ubilinux installed on
your Edison and the Intel Edison is not expecting this so it kind of freezes up
at this point. Here is how to get
around that….

Click cancel to stop the Intel Edison software installation.

Click Yes
Now you need to manually flash the Edison… How do you do
that? First you need to download the
software to flash the Edison back to Yocto and its drivers.
Head over to https://software.intel.com/en-us/iot/hardware/edison/downloads
[10]

If you have never installed the Intel Edison software you
need to
Download the Windows Standalone Driver 1.2.1
After it downloads run it.

Click Run

Click Next

Click I Agree

Click Next

Click Install

Install

Install

Install

Install

Click OK

Click Finish
Now you need the image file
Head over to https://software.intel.com/en-us/iot/hardware/edison/downloads
[10]

Scroll down until you see * Yocto* Complete Image. (currently it's 2.1 but that could change.
Click on it to download the image

After it downloads right click it and select Extract All.

Click Extract (should have current folder listed to extract
to)
Open the new directory.

You should see the flashall.sh.
That is the guy you want…
You want to run this script from cygwin. One easy way to move to the correct directory
in cywin is to…. Type cd then drag and
drop the folder from the folder.


Grab the folder icon you will see a ghost folder appear.

Drop it in the prompt.
The path to the folder should appear.
Click enter.
To run the flash script run the following command
cd into the toFlash directory and run the flashall.sh script
> ./flashall.sh
|

If you get this error " ./flashall.sh: line 108:
dfu-util: command not found" you
have not yet installed the dfu-util command.
Press Ctrl+c to cancel
Run the following commands to install the dfu-util tool
> cd
> git clone
git://git.code.sf.net/p/dfu-util/dfu-util
> cd dfu-util
> ./autogen.sh
> ./configure
> make
> make install
|
If you had to do this run flashall script again (after
moving to the right directory)
> ./flashall.sh
|

When you see this …
Unplug the usb cable and
plug it back in.

Be patient it may take 6-10 minutes to flash it.

When it finishes give it 2 more minutes to set itself up and
reboot.
When all that is done… unplug it and plug it back in.

If you see an Edison hard drive mounted on your system you
are done. You have Yocto installed.
(There is really no need to go back and install the
integrated installer… but you could… after removing the intel drivers you just
installed)

Debugging 2
Here is another issue I ran into…
I have Ubilinux installed on the Edison and working just
fine. Now I want to re-install
Yocto. I have already downloaded the
yocto image from https://software.intel.com/en-us/iot/hardware/edison/downloads
[10] which has its own flashall.sh script.
If I run
> ./flashall.sh
|
I get this odd error.
" Timed out while waiting for dfu device 8087:0a99
DEBUG: lsusb
./flashall.sh: line 74: lsusb: command not found
DEBUG: dfu-util -l
"

I have the lsbusb libraries installed… so what am I
missing. Let me look at the code itself.
> vim +74 flashall.sh
|

Looks like it is just calling a command called lsusb… which
I don't seem to have. But it's only
calling it when it runs into an issue… its trying to give you some debug info.
If I try to run dfu-utl as a test
> dfu-util -l
|
It runs… but I get this error
dfu-util: Cannot
open DFU device 17e9:4301

… what does this
mean?
… OK after going
down several rabbit holes turns out it just eventually worked.
I re-ran
flashall.sh probably 6 times. Unplugging and replugging in the usb cord
when prompted. It just finally worked
one time. Not sure what this means….
But it's good to know when it fails try… try again.
References
[1] Yocto Project
Accessed 5/2015
[2] Emutexlabs
Accessed 5/2015
[3] Cygwin
Accessed 5/2015
[4] Intel Edison Getting Started
– A Step-By-Step Tutorial (windows)
Accessed 5/2015
[5] Getting Started with Intel
Edison Part 1: Introduction
Accessed 5/2015
[6] Loading Debian (Ubilinux) on
the Edison
Accessed 5/2015
[7] Ubilinux Home Page
Accessed 5/2015
[8] New ubilinux for Intel®
Edison released http://www.emutexlabs.com/blog/225-new-ubilinux-for-intel-edison-released
Accessed 5/2015
Accessed 5/2015
Accessed 5/2015
[11] Getting Started with Edison Part 3: Blinking an LED from the Console
https://www.youtube.com/watch?v=cKA2gx4JgSY
https://www.youtube.com/watch?v=cKA2gx4JgSY
Accessed 5/2015
[12] Shield pin GPIO mapping
Accessed 5/2015
[13] Installing libmraa on ubilinux
https://learn.sparkfun.com/tutorials/installing-libmraa-on-ubilinux-for-edison?_ga=1.115999558.1747125872.1435886636
https://learn.sparkfun.com/tutorials/installing-libmraa-on-ubilinux-for-edison?_ga=1.115999558.1747125872.1435886636
Accessed 5/2015
[14] Intel Edison for Arduino
Accessed 5/2015
You don't need cygwin to load Ubilinux. There's an easier way using dfu-util for Windows. You probable already know about it. See: https://learn.sparkfun.com/tutorials/loading-debian-ubilinux-on-the-edison
ReplyDeleteThanks for pointing that out. I was aware of it but I wanted to see if I could do it all in Cygwin, as I wanted to encourage people to use cygwin which I think will be a useful tool to most in the long run. :)
DeleteThanks for pointing that out. I was aware of it but I wanted to see if I could do it all in Cygwin, as I wanted to encourage people to use cygwin which I think will be a useful tool to most in the long run. :)
Delete